Introduction Why Disable Spell Check and Autocorrect?
Windows 11 and 10 offer built-in spell check and autocorrect features designed to enhance your typing. However, these features can sometimes be more of a hindrance than a help. This guide provides clear instructions on how to turn off these features and regain control over your typing experience, tailored for both Windows 11 and Windows 10.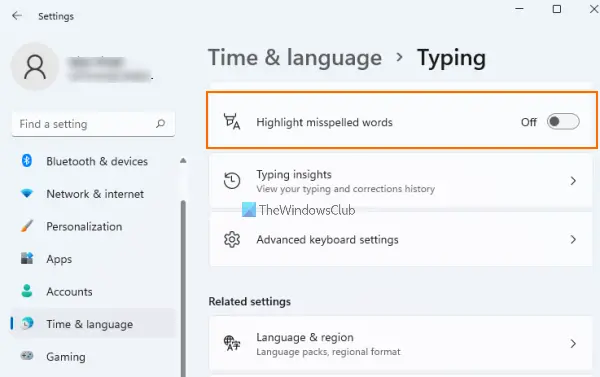
Whether you find autocorrect frustrating, want to avoid highlighted misspelled words, or need a more permanent solution, we've got you covered. We'll explore simple settings adjustments alongside more advanced methods to ensure you can fully customize your Windows environment.
Turn Off Highlighting Misspelled Words in Windows 11/10
If the red squiggly lines highlighting misspelled words are distracting, you can easily disable this feature. Here’s how: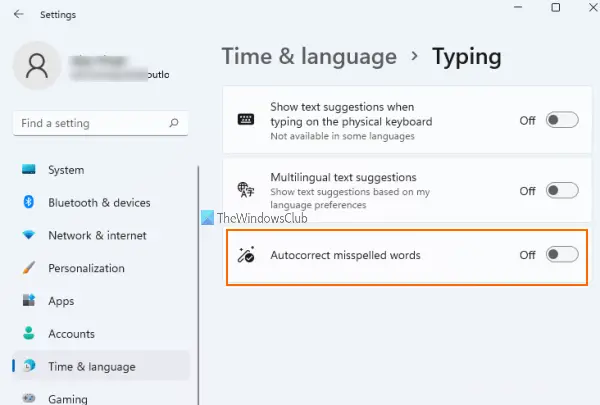
Windows 11:
1. Press Win + I to open Settings.
2. Click on 'Time & language'.
3. Select 'Typing'.
4. Toggle off 'Highlight misspelled words'.
Windows 10:
1. Open Settings.
2. Go to 'Devices' then 'Typing'.
3. Toggle off 'Highlight misspelled words'.
Disable Autocorrect Misspelled Words in Windows 11/10
To prevent Windows from automatically correcting your typing, follow these steps:
Windows 11:
1. Press Win + I to open Settings.
2. Click on 'Time & language'.
3. Select 'Typing'.
4. Toggle off 'Autocorrect misspelled words'.
Windows 10:
1. Open Settings.
2. Go to 'Devices' then 'Typing'.
3. Toggle off 'Autocorrect misspelled words'.
Permanent Completely Disable Spell Checker & Auto-Correct
For a more permanent solution, you can disable spell check and autocorrect through the system files. This method requires administrator privileges.
Important: Before proceeding, create a system restore point. Incorrect modifications can cause system instability.
1. Press Win + R, type C:\Windows\System32, and press Enter.
2. In the System32 folder, search for files starting with 'MsSpell'.
3. Take ownership of these files. (Right-click on each file, select 'Properties', go to the 'Security' tab, click 'Advanced', click 'Change' next to 'Owner', enter your username, and click 'OK'.)
4. Rename these files to something you can remember (e.g., MsSpellCheckingHost_old).
5. Restart your computer. This should disable the spell check and autocorrect features.
To re-enable: Rename the files back to their original names and turn on the options in Windows Settings.
“Take control of your typing experience and customize Windows to fit your needs.
The Content Alchemist
Further Customization
Explore these other options for controlling your text input.
Group Policy Editor (gpedit.msc)
Use the Group Policy Editor (available on Pro and Enterprise editions) to manage spell check settings. This offers more centralized control.
Registry Editor (regedit)
Modify registry settings to disable spell check and autocorrect. Exercise caution when using the Registry Editor as incorrect changes can harm your system.
Alternative Language Switching as a Temporary Solution
If you're looking for a temporary workaround, you can switch between languages to minimize autocorrect interference. Add a secondary language in Settings -> Time & Language -> Region & language. Then, press Windows key + Spacebar (or Windows Key + C, as previously mentioned) to switch between languages while typing, which might reduce the number of corrections.
Shortcut Is There a Key?
Unfortunately, there is no direct shortcut key for toggling the spell checker on or off within Windows 11 or 10. You must access the settings through the Settings app. However, within Microsoft Word and similar programs, the F7 key usually triggers the spelling and grammar check.