Understanding the Issue Why Disable Spell Check & Autocorrect?
While spell check and autocorrect are designed to enhance the typing experience, they can sometimes hinder productivity. This guide addresses the frustration of unwanted corrections and offers solutions for Windows 11 and Windows 10.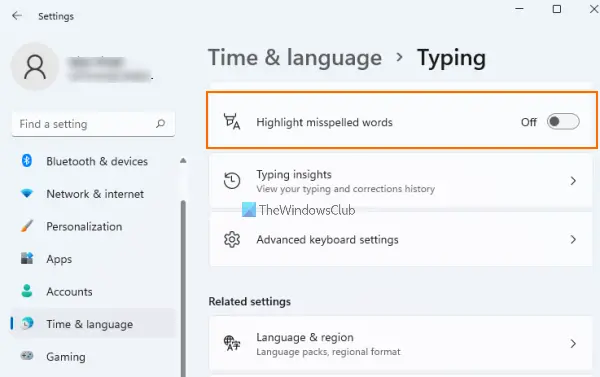
Whether you're a professional writer, a student, or simply someone who prefers manual control, this article provides clear instructions to disable these features.
Windows 11 Disabling Spell Check and Autocorrect in
Here's how to disable 'Highlight misspelled words' and 'Autocorrect misspelled words' in Windows 11: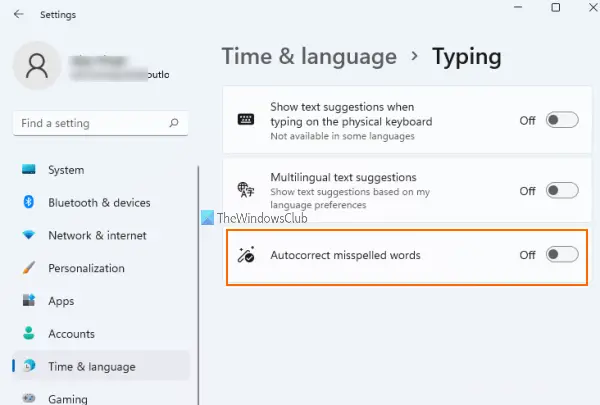
1. Press Win + I to open Settings.
2. Click on 'Time & language' and select 'Typing'.
3. Toggle off 'Highlight misspelled words' and 'Autocorrect misspelled words'.
Windows 10 Disabling Spell Check and Autocorrect in
To disable autocorrect in Windows 10:
1. Open Settings (search for it or use the Win + I shortcut).
2. Navigate to 'Devices' > 'Typing'.
3. Toggle 'Autocorrect misspelled words' to 'Off'.
“Take back control of your typing experience. This guide empowers you to customize your Windows environment.
The Content Alchemist
Take Action Now!
Choose your preferred method to disable autocorrect and spell check.
Settings App
Easily disable spell check and autocorrect through the Windows Settings app.
Advanced System Modification
For a more comprehensive solution, try renaming the system files. (Exercise caution!)
Advanced Options Completely Disabling Spell Checker & Autocorrect
For a more permanent solution (use with caution), you can disable spell check and autocorrect completely. *Note: This involves system file modifications, so back up your system before proceeding.*
1. Press Win + R, type C:\Windows\System32 and press Enter.
2. Search for MsSpell in the System32 folder.
3. Right-click each MsSpell file, select 'Properties' > 'Security' > 'Advanced' > 'Change' (next to 'Owner'). Change ownership to your user account.
4. Once you have ownership, rename the four found files (e.g., MsSpellCheckingHost to MsSpellCheckingHost_old).
5. Restart your computer.
Shortcut Key Is There a Shortcut for Spell Check?
There is *no* global shortcut key for the spell checker feature in Windows 11 or 10. You must access the Settings app to toggle it. However, within Microsoft Word and other word processing software, the F7 key is often used for spell and grammar checks.
Remember that disabling spell check and autocorrect can impact your writing accuracy. Always proofread your work carefully.