Why Enable Two-Factor Authentication in Gmail?
In today's digital landscape, securing your Google account is crucial. Two-Factor Authentication (2FA) adds an extra layer of security, protecting your Gmail login and personal data from evolving cyber threats. This guide provides a detailed walkthrough on setting up 2FA in Gmail, covering methods like SMS verification and the Google Authenticator app.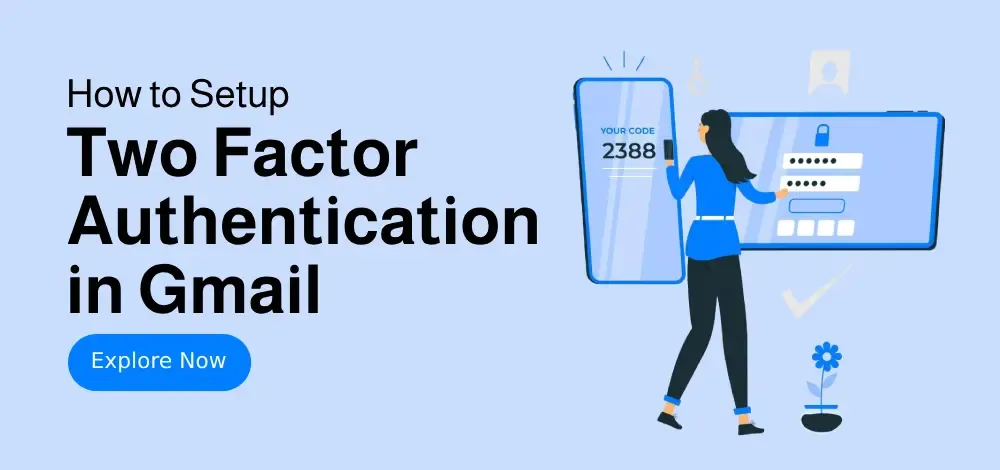
With 2FA enabled, your account requires a second verification step beyond just a password, significantly reducing the risk of unauthorized access. Even if someone obtains your password, they won't be able to access your account without the second verification method. This is a critical step in preventing Gmail hacking and ensuring your Google login security.
Methods How to Set Up 2FA in Gmail (2 )
We'll guide you through two simple methods to enable Google multi-factor authentication in Gmail to enhance your account security: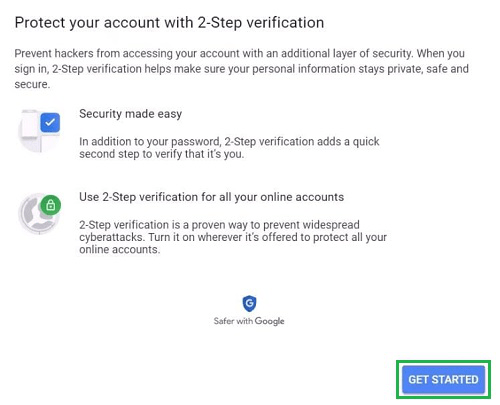
Method 1: Using SMS or Phone Calls, Method 2: Using Google Authenticator App.
Method 1 Using SMS or Phone Calls
Follow these steps to enable two-factor authentication in Gmail using SMS or phone calls:
Step 1: Open Your Google Account and Access the Security Tab. Open your Google Account and go to the top-right corner and click on your profile picture or initials. Select 'Manage Your Google Account' from the dropdown menu. On the left-hand side menu, locate and click on the 'Security' tab to access the security settings for your account.
Step 2: Navigate to the 2-Step Verification Section. Scroll down the Security page until you find the section labeled 'Signing in to Google.' Here, you will see the option for '2-Step Verification.' Click on this option to proceed. This feature adds an additional layer of security to your Google account by requiring verification beyond just a password.
Step 3: Click on Get Started. You will now be taken to an introductory page explaining the benefits of 2-Step Verification. Read through the information provided and, when ready, click on the 'Get Started' button to begin the setup process.
Step 4: Enter Your Mobile Number. Google will prompt you to enter your mobile phone number. Make sure to provide a valid and accessible phone number, as this will be used to receive verification codes. You can choose to receive the codes via text message (SMS) or a phone call. After entering your number, click 'Next'.
Step 5: Enter the Code Sent to Your Phone. Shortly after submitting your phone number, Google will send a verification code to the number you provided. Check your phone for the code, then enter it into the designated field on the screen. Once entered, click 'Next' to continue.
Step 6: Turn On 2-Step Verification. After successfully verifying your phone number, you will be presented with an option to enable 2-Step Verification. Review the settings and then click the 'Turn On' button to activate the feature for your account.
Step 7: Complete the 2-Step Verification Setup. Congratulations! You have successfully enabled 2-Step Verification for your Google account. From now on, whenever you, you’ll need to provide both your password and a verification code sent to your registered mobile device, ensuring enhanced account security.
Method 2 Using Google Authenticator App
Follow these steps to enable Google Authenticator for 2FA in Gmail:
Step 1: Install Google Authenticator. Download Google Authenticator from the App Store or Google Play.
Step 2: Link Authenticator to Gmail. In Google Account Security, select 'Authenticator App' under '2-Step Verification'.
Step 3: Set up with QR Code. Click 'Set Up'. Scan the QR code with the app or manually enter the setup key > Click 'Next'.
Step 4: Open App and Scan. Once QR code generated, open the Authenticator app scan the QR code to proceed the 2 FA in gmail.
Step 5: Verify and Save Backup Codes. Enter the time-based OTP generated by Google Authenticator > Click 'Verify'. Download or print backup codes for emergencies (e.g., lost phone).
“2FA is not an option anymore, it is a necessity for securing your digital life.
Security Expert
Interactive Features
Enhance your learning with these interactive elements:
2FA Quiz
Test your knowledge with a quick quiz on Two-Factor Authentication.
Video Tutorial
Watch a step-by-step video guide on setting up 2FA in Gmail.
Troubleshooting Two-Factor Authentication (2FA) Tips
If you encounter any issues, here are some troubleshooting tips:
1. Lost Access to Google Authenticator: Use backup codes saved during setup. Navigate to '2-Step Verification' > 'Replace Authenticator' > Re-scan QR code.
2. No SMS Verification Code Received: Check carrier signal (common in rural U.S. areas). Use Google Prompt as a backup method.
3. Disable 2-Step Verification Temporarily: Go to 'Security' > '2-Step Verification' > 'Turn Off' (requires password confirmation).
Advanced Security Practices for 2025
As cyber threats continue to evolve, simply enabling 2-Step Verification (2FA) is not enough. To ensure maximum protection for your Gmail account, here are some advanced security measures you should implement:
• Enable Google Prompt for faster logins.
• Set up backup phone numbers for emergency access.
• Monitor suspicious activity via Google’s Security Checkup.
• Update recovery information every 6 months.
• Use biometric authentication (fingerprint or face unlock) for additional security.
By adopting these practices, you’ll stay ahead of evolving cyber threats while maintaining seamless access to your Gmail account.
Conclusion
Activating Two-Factor Authentication (2FA) is a simple yet effective step toward securing your Google account from cyber threats. Whether you choose SMS verification or the Google Authenticator app, adding this extra layer of protection helps prevent unauthorized access and strengthens your Gmail authentication setup.
While passwords can be compromised, 2FA in Gmail ensures that your account stays safe even if your credentials are leaked. Don’t wait until it’s too late—take a few minutes today to set up two-step verification in Gmail and safeguard your personal and professional communications.